
|
|
||
|
|
||
| Catalog # 1 | 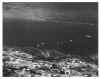 |
Stick of 8 floats down over Landing Zone A |
|
|
||
| Catalog # 2 | 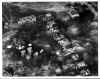 |
Stick of 5 float down over Landing Zone B |
|
|
||
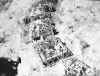
| Catalog # 3 | 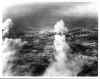 |
Panorama of Landing Zones A and B |
|
|
||
| Catalog # 4 | 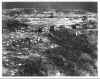 |
Landing Zone A |
|
|
||
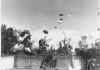
| Catalog # 5 | 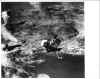 |
North Dock |
|
|
||
| Catalog # 6 |  |
The 2nd Wave |
|
|
||
| Catalog # 7 | 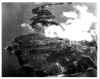 |
Topside looking East |
|
|
||
| Catalog # 8 | 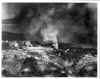 |
Middleside & Ramsay Ravine |
|
|
||
| Catalog # 9 | 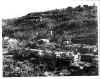 |
Middleside looking towards Topside |
|
|
||
| Catalog # 10 | 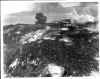 |
Topside under bombardment |
|
|
||
| Catalog # 11 | 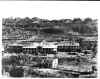 |
The Hospital |
|
|
||
| Catalog # 12 | 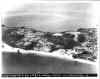 |
92nd Garage Area |
|
|
||
| Catalog # 13 | 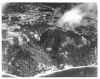 |
Crockett Ravine |
|
|
||
| Catalog # 14 | 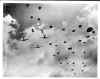 |
503 Drop #1 |
|
|
||
| Catalog # 15 | 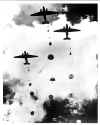 |
503 Drop #2 |
|
|
||
| 16 not available |
 |
Landing Zone B |
|
|
||
| 17 not available |
 |
Jump Photo x 2 |
|
|
||
| Corregidor - Then & Now GHQ | Coast Artillery - Harbor Defenses | 503d RHQ | 503d PRCT Heritage Bn. | Rock Force | Board |
H Version 09.09.11